
I think I will be heading out tonight to buy some fabric for use as backdrops.
Definitely black but I may also get a white one...I'll have to see what they have when I go. I also have to figure out what kind of fabric will work for photography...can't be too shiny or to sheer...ugh, I hope this doesn't turn out to be a nightmare in choosing. :)
I found this site that talks about what you can buy (fabric-wise) and I printed this to take with me: http://www.betterphoto.com/exploring/MakingBackDrops.asp
I also found this DIY site that talks about making your own colored backdrop:
Cheap DIY (Homemade) Muslin Photography Background
Spice up your home made muslin backdrop
Tomorrow I'm photographing my friend's newborn baby. This will be my first time photographing a baby so this is all good experience. She wants to use one for the family's Christmas card which is so nice. That will be 2 Christmas cards with my photos this year. I love that! :)
I'll be sure to share some once I edit them!
------Update------
I just got back from JoAnn Fabrics store and I picked 4.33 yards of black Muslin. It was 7.99 a yard (AAACK!) I bet I could have found it much cheaper elsewhere but I didn't care because I needed something for tomorrow.
I got it 108 inches wide because that was the largest width they had in black. Now, I have no experience at all with this kind of thing so I couldn't even tell you if this fabric will work. I hope it's not too thin or two wrinklely...well the wrinkle problem can be handled with an iron (yuck...ironing...uuughhh)but the too thin will be very bad.
I know nothing about lighting but I hope that the flash and some room lights will work (I pray). But, this is all experimental so I'm not worried. :)
EDIT: Oh! I just got a link to this great DIY backdrop hanger. I think a trip to IKEA might be in order: http://yellowfence.blogspot.com/2007/06/cool-photo-backdrop.html
My great friend Julie has shared some wonderful photographers to look at examples of their work for tons of great ideas. THANKS JULIE!
FOOTPRINTS PHOTOGRAPHY
JAMIE HAMMOND PHOTOGRAPHY
EDITED 3/31/08 - MORE BACKDROP INFORMATION:
See this post for more information on backdrops I obtained "cheap" and info. on backdrop stands:
http://jenweaverphotography.blogspot.com/2008/03/make-your-own-photography-backdrop-with.html
Friday, November 30, 2007
Backdrops - Make Your Own!
Thursday, November 29, 2007
Dragan, Dragan, Dragan - The Dragan Effect
Last night I took some fun photos of the kids after portraits and when I got home I tried this technique called the Dragan Effect named after a famous photographer Andrzej Dragan. Check out his work HERE.
Last night's creation:
Then I spent tonight making these:
I think this one is the best of the night:
Oh...and one more I just finished:
These two boys provide me THE BEST poses/faces for this kind of work!
Here is a great DRAGAN EFFECT tutorial that was recommended to me. It's very in depth and does a good job explaining "how to" step by step:
DRAGAN EFFECT PHOTOSHOP TUTORIAL - The best free videos are right here
If you find this tutorial helpful please leave me a comment below. :)
Wednesday, November 28, 2007
Family Photo Christmas Shoot
My friend asked me to take some photos of her and her 2 sons because her mother wanted to use them as Christmas cards so I went there tonight and shot some quick photos for them aroud the house.
I'm excited that my website host started offering holiday cards for customers.
This is probably the "keeper" shot ... they just have to finalize the card type our of the 36 varieties.
I like this one too...
I liked how this one came out as well:
And I couldn't resist this one of my friend:
Do it Yourself Lightboxes, Ring Lights, Gel Lights for Product Photography
I created my own "Do It Yourself Lightbox"
To view my Tutorial click here: http://jenweaverphotography.blogspot.com/2007/12/do-it-myself-lightbox.html
Links to Do It Yourself Softboxes, Light Tents, and a $10 Macro Studio:
Homemade Light Box for Product Photography
Light Box / Light Tent
How To: DIY $10 Macro Photo Studio
Guide/Techniques on Photographing Jewelry:
Jewelry Photography Techniques
Do it Yourself Ring Light Tutorials:
DIY Ring Light free standing
You can also reference another post I wrote with a link to an on-camera DIY Ring Light.
The Foamcore Homemade Softbox - How It's Built
http://www.studiolighting.net/foam-core-homemade-softbox/
Do it Yourself Gel Light:
Gel Light
Article on Taking Professional Looking Photos Without a Professional:
Pro Photos Without Being a Pro
Now that I've created the first light box with the foamcore boards I can photograph my handmade jewelry with ease or any other macro photograph that needs good lighting! :)
Tuesday, November 27, 2007
Correct Converging Lines / Lens Distortion
I learned about this freeware program this on my Photography Forum today that helps correct "converging lines" in your photographs.
I tried it tonight and it worked wonders!! Give it a try!
This is what was posted on the forum:"To correct the converging lines I used a very nice and easy to handle software called "ShiftN"
It's Freeware and you can read/download it here: ShiftN
Language is German or English"
Monday, November 26, 2007
Dreary Day
Well, today was my last day off from work and it was totally DREARY! Rainy and foggy and such a chill in the air.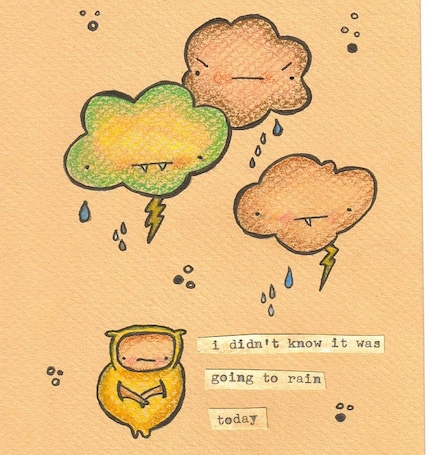
If I knew it was going to be a terrible rainy day I would have saved the vacation day for another day or taken it last week...but what can you do? At least I got to catch up on some photos.
-------------------------------------
After I worked on my Christmas tree for a little while I decided that i wanted to try some ideas with multiple exposures and shooting low lights shots to create more HDRs.
My tree before the garland:
With the garland:
Once I put the ornaments on tomorrow I will take a shot of the complete tree and add it so you can see the results.
I'll also be shooting the tree outside through the bay window (just thought of that idea tonight). :)
The angel on top:
Close up on the lights:
A snowman gord (light) I have (this is the light in his belly):
So, it turned out to be an interesting photo day after all....I guess if you get bored enough on a "dreary" day you can come up with lots of great things to experiement with and photograph! :)
Sunday, November 25, 2007
Another Photo Trip Before Dark
Worked on editing photos all day and putting them on my website hosted by Smugmug.
Around 3:30pm I got tired of sitting around the house and I decided to run out to the D&R Canal close to my house to try to shoot some more RAW format multiple exposures to create more HDR photographs in Photomatrix.
Luckily the weather was a little warmer than the past couple days were. I took quite a few images while I was out and I'm going to be working on them tonight and tomorrow. Here are some new ones from today:
(CLICK THE PHOTOS TO VIEW LARGER)


Please feel free to take a look at my entire HDR Gallery by clicking HERE. I've added quite a few to my gallery that I haven't posted here.
Saturday, November 24, 2007
Quick Little Photo Trip - Turned Out To Be Very Fruitful!
I spent the day indoors today working on my family portraits from Thanksgiving and decorating the house for Christmas. Around 3:30pm I decided to run out for a few minutes to get some photos in locally before the sun went down.
I stopped at an area I found on Thursday that was part of the D&R Canal. Just when I think I've seen all of the canal I keep discovering so many more great parts of it.
I went out purposely to take more RAW shots in multiple exposures (3). I've been on a kick of working on HDR's and I'm loving the results I get with a lot of them.
These are some I took today and worked on in Photomatrix.
This one was a random find. I came to the end of a street and found this sight before my eyes. I literally stopped the car, pulled out the camera and tripod, shot a number of shots, and then got back in my car to get to my next destination. I just can't pass up a great tree-lined path like this!
(click to view larger)
This photo was take at St. Joseph's Seminary. The building pictured is the Mary Immaculate Library. I never knew this place exsisted even though I've lived close to this area all of my life. When I was done with my photo hunt on Thursday I decided to take a new way home and found it (I always suggest doing this. You can find some great photo ops you never knew existed this way). SO today I went back to photograph it. After I was done a priest came out to chat and told me I'm welcome to photograph the chapel anytime which I thought was nice because I love photographing churches and there's was a nice one (I just didn't have time).
(click to view larger)
This was a spot right near the seminary. I love how this came out. I wished it wasn't getting dark while taking these shots but I think they worked out for the best with the dark shadows.
(click to view larger)
And a wide view (I couldn't decide which view I liked...tall or wide?)
And another by the D&R Canal. I'm loving this one!:
Friday, November 23, 2007
Article I Read
Just wanted to share an article I just read on Understanding Light. To read it click HERE.
Thursday, November 22, 2007
Giving Thanks
Today was Thanksgiving and we were blessed with beautiful weather (66 degrees).
We got together at my mother's house for Turkey dinner. I decided to take my camera (of course) and I also brought along my tripod and new Gary Fong Lightsphere.
I thought it would be nice (especially with the nice weather) to take some portraits of my family (including myself). Everyone was up for the idea so we took them right when I arrived at my mom's.
We found a nice spot outside her house and I set up the tripod, etc and joined the group for photos. The thing that made it very easy was the remote control shutter release. I could get everyone set up through the view finder and then join them with ease and snap the photo.
I made sure I tried to find a little shade but we were limited where we could take the photos where my mom lives. I used the flash (with the lightsphere) like everyone suggested and it worked really well.
We got some great shots and some fun ones too! My sister and her husband didn't arrive until it was dark so they weren't able to join in the pics but I got some nice ones of my grandfather, my aunt, my, my husband and my mom.
Check out a few below:


This was tonemapped in Photomatrix. I wanted to make it look "funky":
Wednesday, November 21, 2007
To RAW or Not to RAW? ...... and HDR!
Well....I finally came around and decided that I would try to shoot in RAW format. I was on the fence about it for months and while I had off from work today I decided to do a test shot in RAW out my front door and then I sat at my computer and viewed the file in Abode Bridge.
Adobe Bridge allowed me to do some basic adjustments and then I saved the file as a jpeg and opened it up in Photoshop for some tweaks.
The next thing I tried was opening the RAW image in Photomatrix and "tonemapping" the photo. Again, I didn't chose the best image but I was able to get the "idea" of how it worked.
This really sparked my interest so I decided to leave the house and head to a favorite photography spot I found a couple months ago. I brought the tripod for once and got all set up. I set the camera to RAW + jpeg fine (because I just can't give up on jpeg yet and why not have the best of both worlds?) and I read the manual regarding bracketing while I was standing there to figure out how to set the camera for that as well. I also remembered to bring my remote shutter release (that I purchased with my camera at B&H Photo in New York City) with me to minimize the chance of camera shake.
Once I was all set up I was ready to start framing shots and taking photos! I wasn't sure if what I was doing was right because I'm still shaky on figuring out aperture and understanding what bracketing setting I should be using. So, today was really just a test.
When I got home and started working with the RAW files as well as the multiple exposures in Photomatrix I was shocked and amazed to see the details the RAW file includes (I should have listened to what everyone was telling me forever!!) and I was also extremely impressed with the HDR conversions....as a matter of fact - after only 4 times working with HDR in Photomatrix - I am officially hooked!
RAW shot with 3 exposures:
RAW shot with 3 exposures:
RAW shot with 3 exposures:
RAW shot with 3 exposures (I'm going to get this one printed!):
RAW shot tonemapped in Photomatrix:
So, as I said...I'm over the moon about HDR. They just look so surreal...like a painting. I just love what I've done so far and I have a lot more to work on to add to this.
I created a gallery on my website specifically for HDR. To view it click HERE.
Tuesday, November 20, 2007
Vacation
Yes, I'm serious...I'll be editing, editing, and editing all day if the weather is bad. Maybe one day I will get caught up!
Tonight I worked on a number of photos in Photoshop and here are a couple favorites (these 2 photos are from the fall foliage drive discussed in my blog HERE.)


Monday, November 19, 2007
Tonights Editing Session

I also (finally) added some photos to my flickr account. I've had it for quite a while and I just never have enough time.
Their new uploader makes it really easy to add photos now so I went for it. I figure when I have time I'll upload photos to it from time to time...maybe my favorite recent pieces.
This is the direct link to my Flickr page:
http://www.flickr.com/photos/jenweaverphotography/
Sunday, November 18, 2007
New Home for Family...and More
Today we spent the day with my mother & father in law. They just moved into a retirement community and we were very excited for them. Yesterday was moving day so today we went over to help them where we could.
Before I left I went around the house taking photos of each room in various angles for to document everything before they decorate, etc.
Before we left I snapped a shot of the outside:
Spent the evening editing in Photoshop. This tool a long time to get the sky to look like this...I'm still trying to figure out layers...so this took me quite a while to get right:
I like these as well...before tonight I never thought of using actions like this on landscapes:


Saturday, November 17, 2007
More Wedding Snaps
Here are few favorites of shots from the wedding. Unfortunately it was a bit dark in the ballroom so I had to bump up the ISO. I only had the on-camera flash (which did pretty well considering) because I didn't want to bring the external flash with me.
Bumping up the ISO left some of the further away shots grainey so I worked with the photos in Photoshop on some filters and coloring to enhance them the best I could.

The crowd around the bride and groom was very distracting so I duplicated the layer, applied a gaussian blur (around 40? I think...can't remember) and then I used the eraser tool to erase the bride and groom so that they were the only area that was clear. 


I'm working on the photoshoot mentioned in a previous post which can be read by clicking HERE. Trying to catch up....(which will never happen).
For this photo I spent a lot of time burning & dodging. It was a simple color shot of the fenceline. I converted to B&W using the black & white feature in CS3, worked with the levels, shadows & highlights, and then went to work burning & dodging the light and dark areas. I applied an unsharp mask twice and then for some reason I decided to start to burn the edges. It created a feeling (in my opinion) if looking at this scene throgh and old window where that glass has become cloudy on the edges. I really love how it came out. Hope you like it:
This is a color shot of the same farm with a few sheep out in the pasture. It was such a strage day...some parts of the sky blue some parts of the sky white. I had such a tough time with every shot that day. I did a lot of burning to the sky to try to bring out the clouds...not sure if it looks unrealistic but I like it no matter what. I used the hue & saturation tool in photoshop to individually saturate the reds, the yellows, and the greens. 
For this shot I took a basic scene of a bale of hay and some farm land and converted it to B&W, used the history brush to color the bale of hay, and then worked with "burning" to make the sky more defined. Before I worked on the sky it was almost cloudless.


